TIDY Concierge
The Concierge combines our AI agent with 24/7 humans to help.
AI can make mistakes. Please verify important information.
Creating Checklists
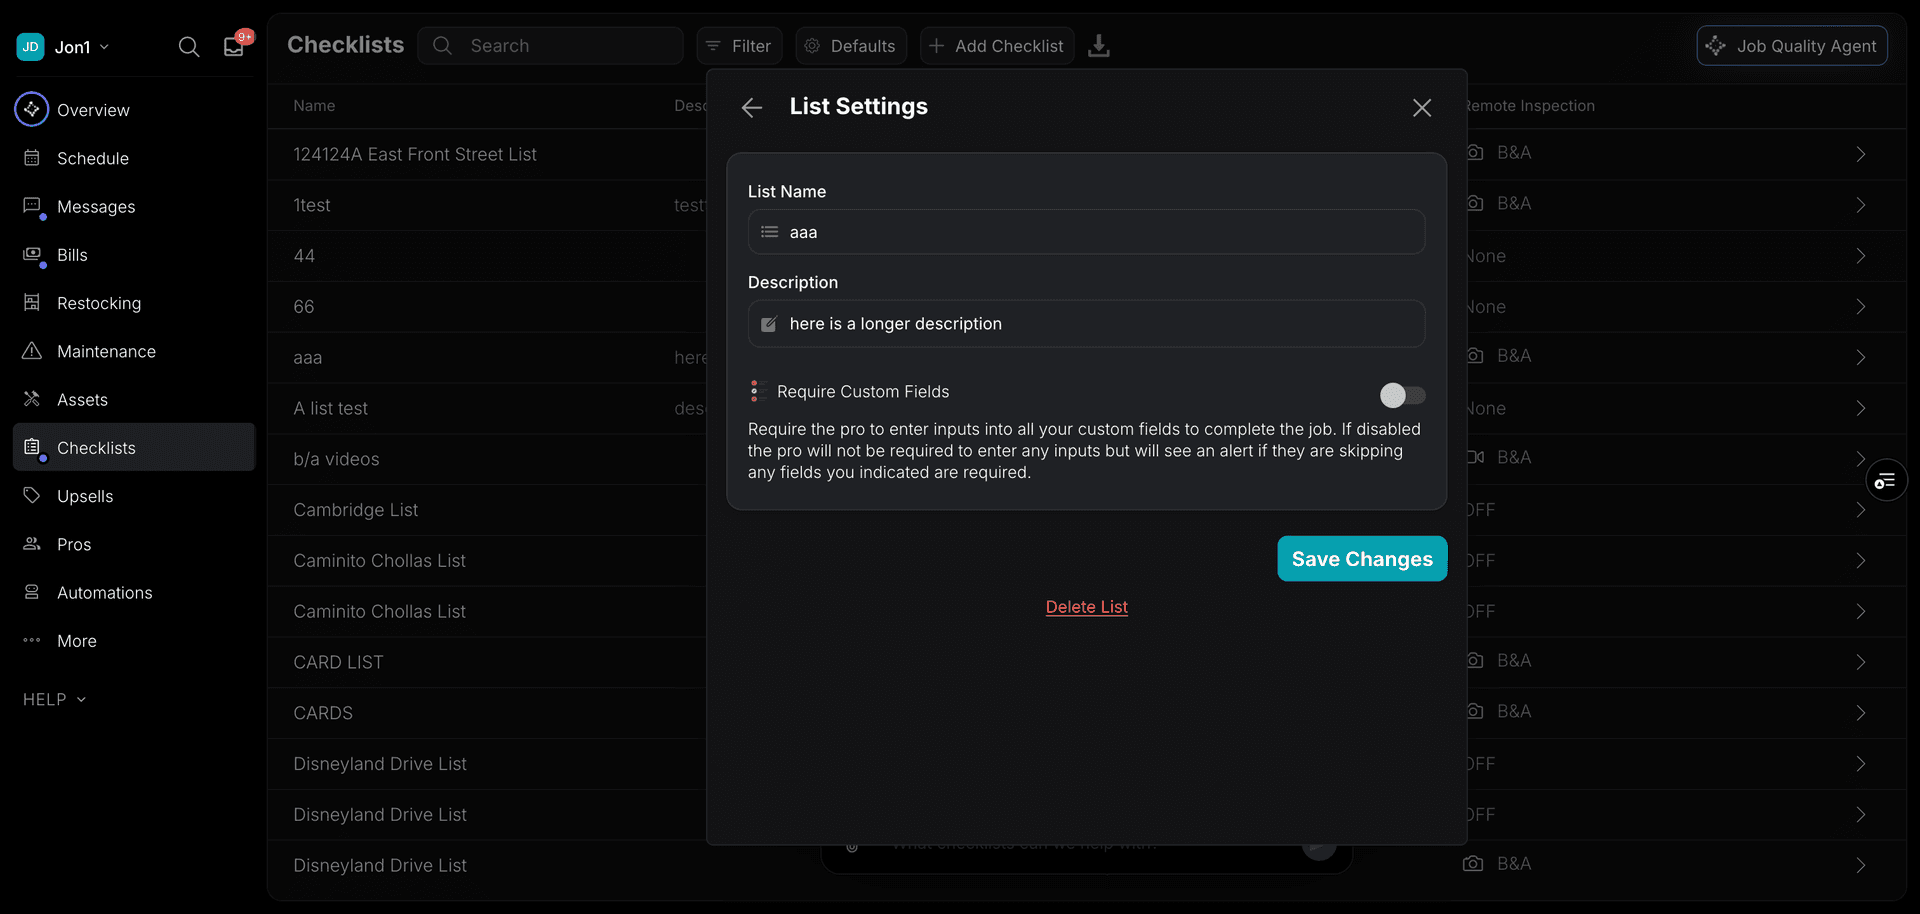
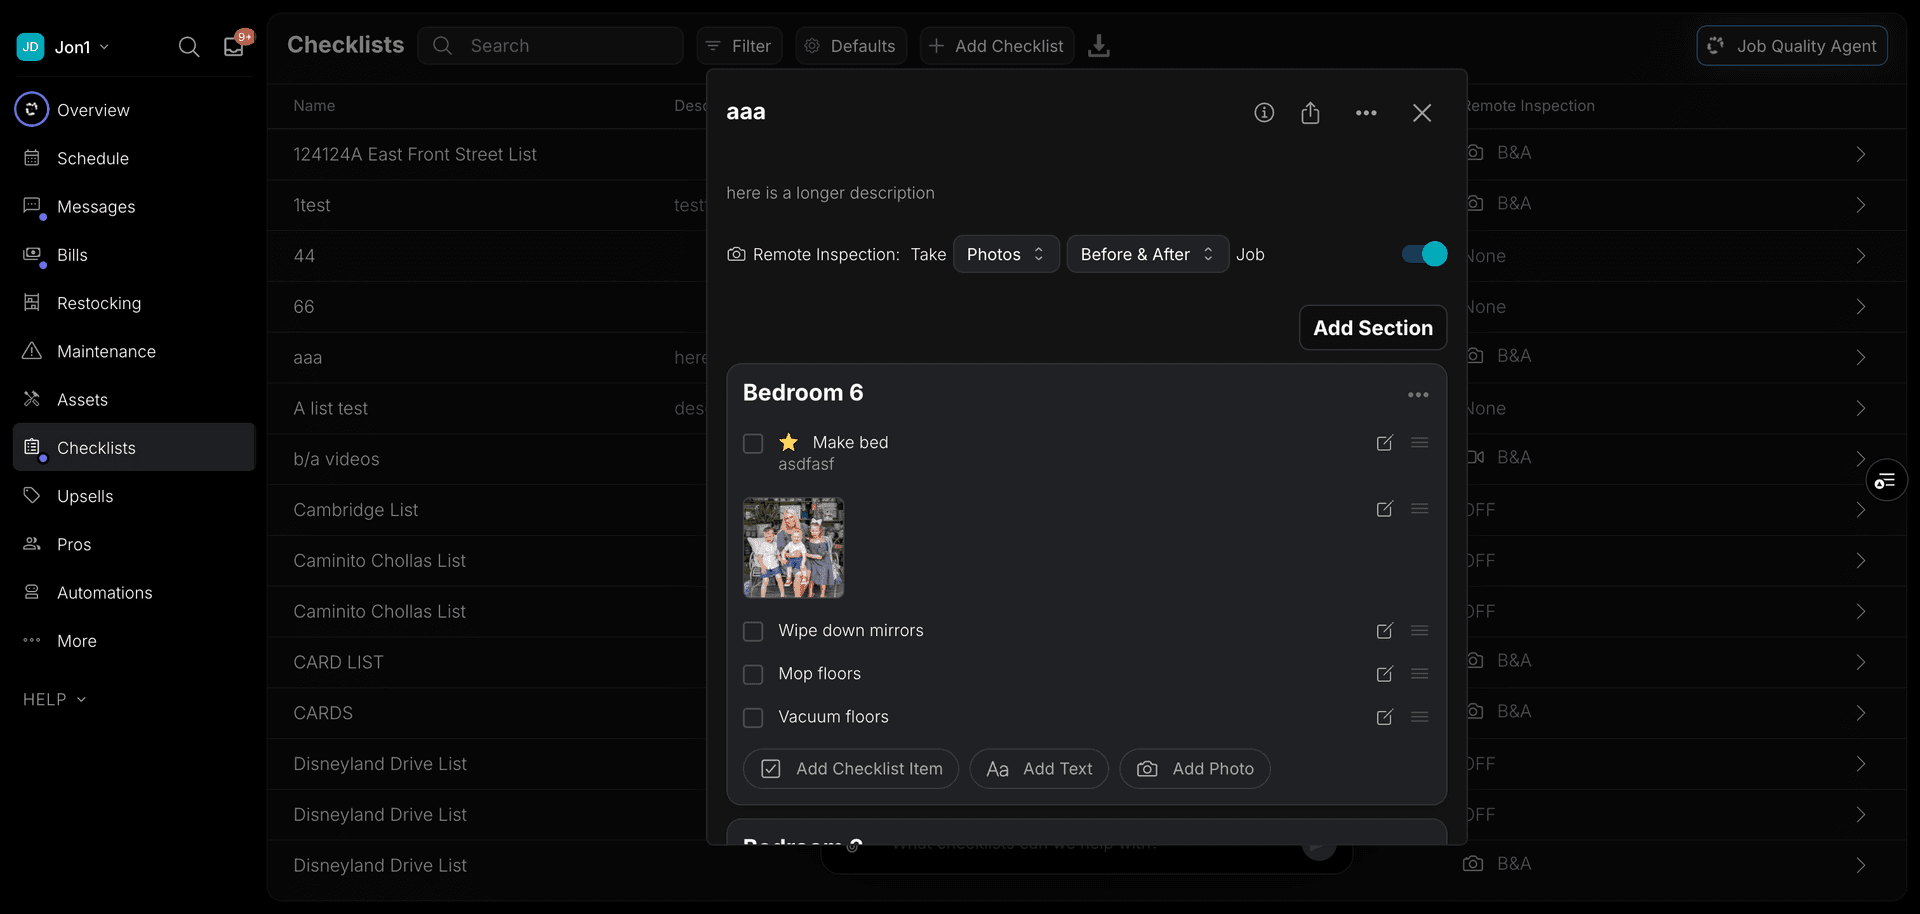
Each checklist item lives as a set of items on 1 or more "cards". These cards can be associated with a room, or not.


What happens when you associate a card to a room?
- You can see a history of all checklist items completed by room.
- Because this is tied to a specific room, you can’t copy rooms to other properties.
| Associate With Rooms | Don’t Associate With Rooms |
|---|---|
| You want detailed reporting per property/room | Tracking items done by specific room is not important. |
| You are ok with more time and setup | If you use the same "template" across jobs |
Creating a new checklist
To create a new fully customizable checklist using cards:
- Log into your TIDY account and navigate to the "Checklists" page.
- Click on the dropdown menu and select the "+ Add Checklist" option.
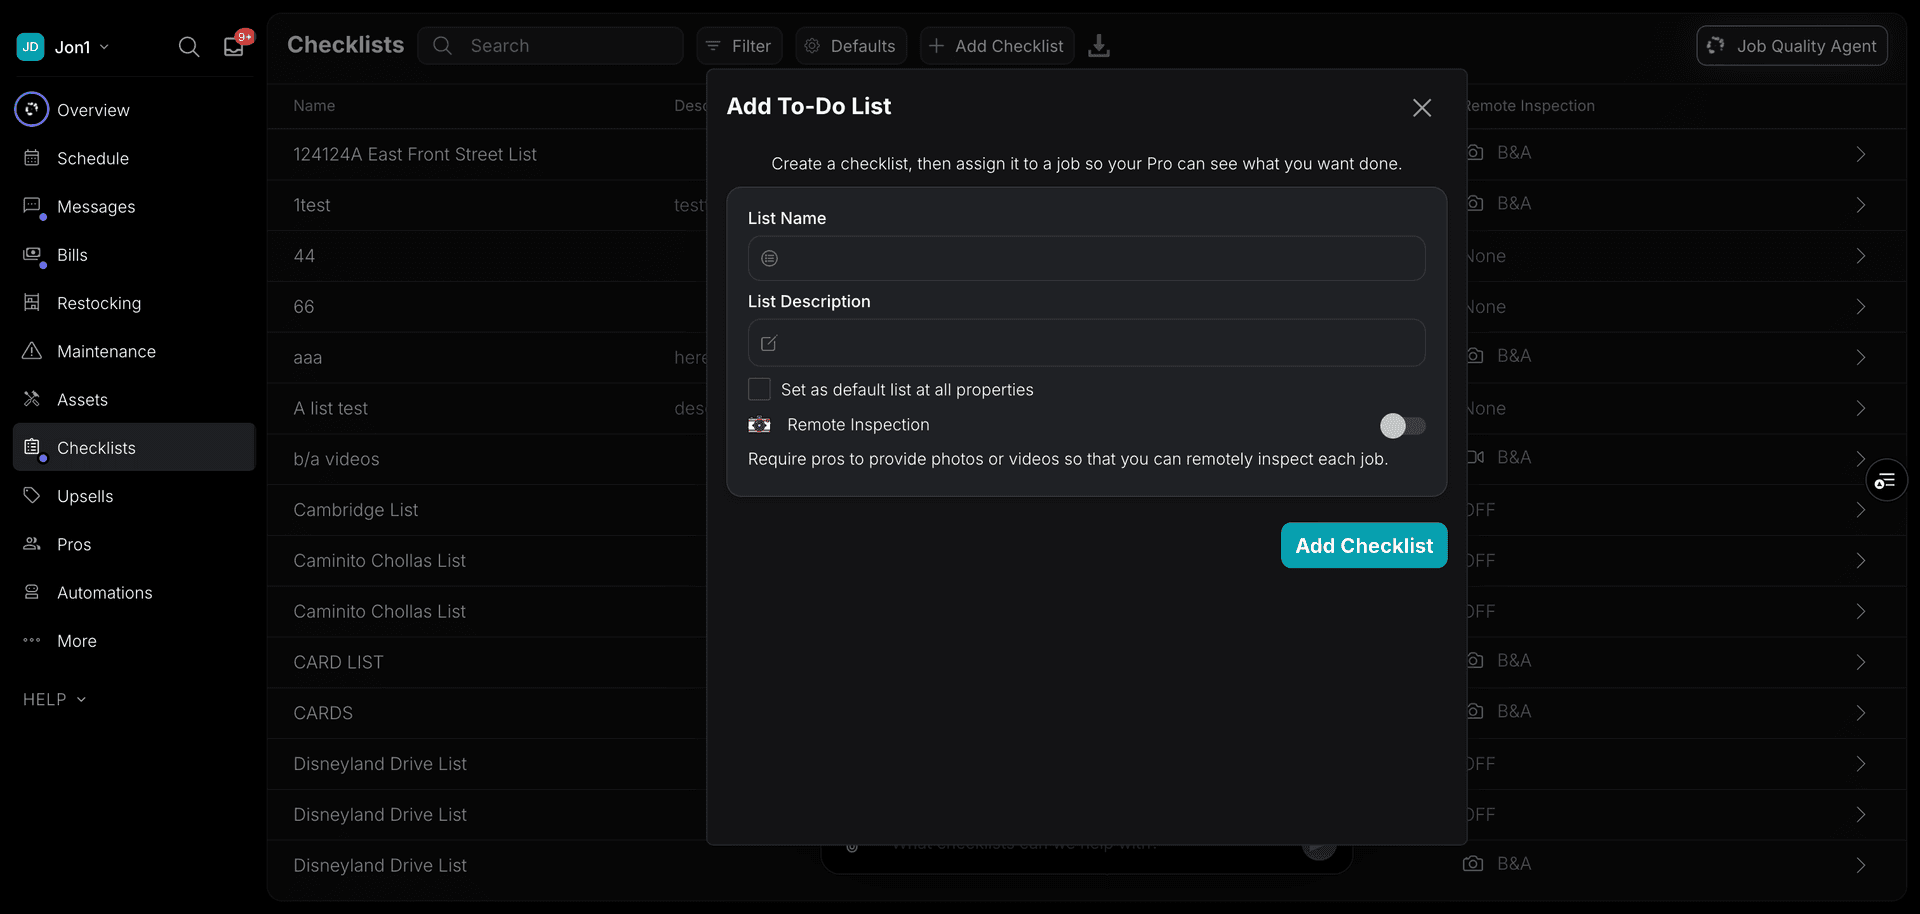
- Select the address to add your checklist
- Add a name to the checklist
- Click on the "Add Checklist" button
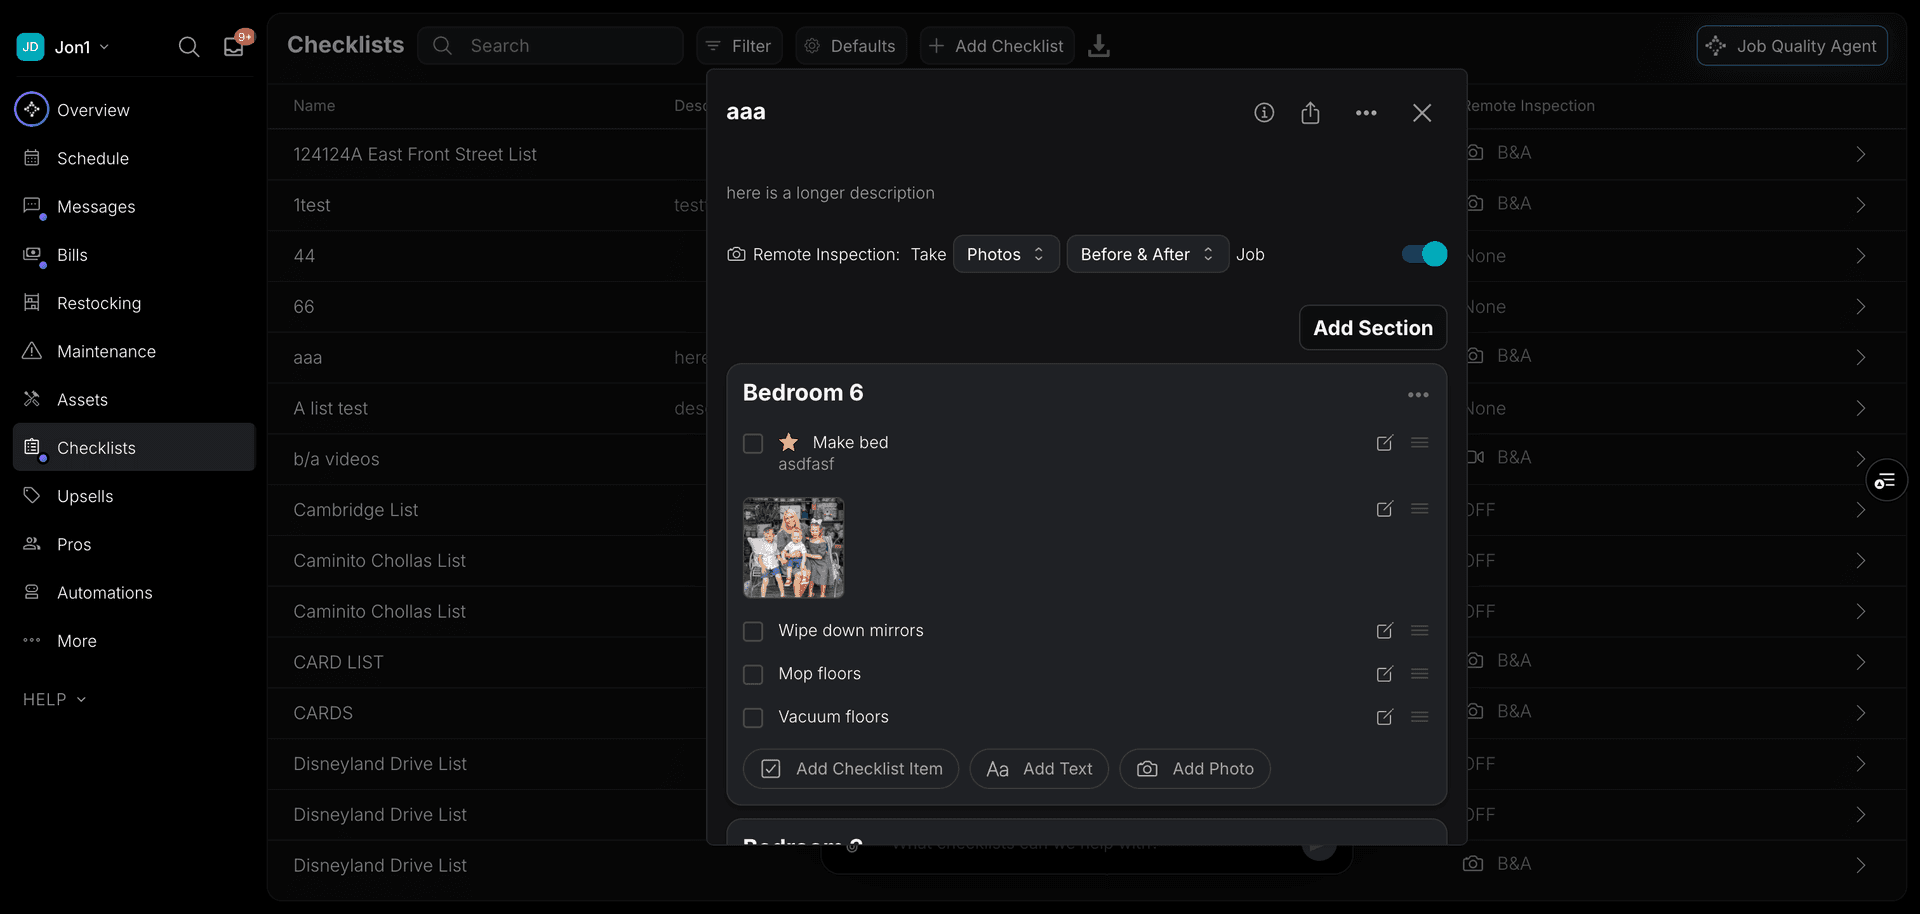
Adding cards and checklist items
Once the checklist is created, you can start adding cards and checklist items to it.
- Click on the "+Add" button to create a new card.
If you want to associate the new card with any existing room in your home, enter the room details and click on "Add card". Select "No" and enter a card name for better customizable needs.
You can add multiple cards, associated with existing rooms or not, to your new checklist.

To add checklist items to your cards, click on the "+" button in any section. An inline text input appears with autocomplete suggestionsbased on the section type. For example, a "Kitchen" section will suggest common kitchen tasks like wiping counters, cleaning the sink, and cleaning appliances. You can also expand the form to add notes, photos, estimated times, or custom fields.
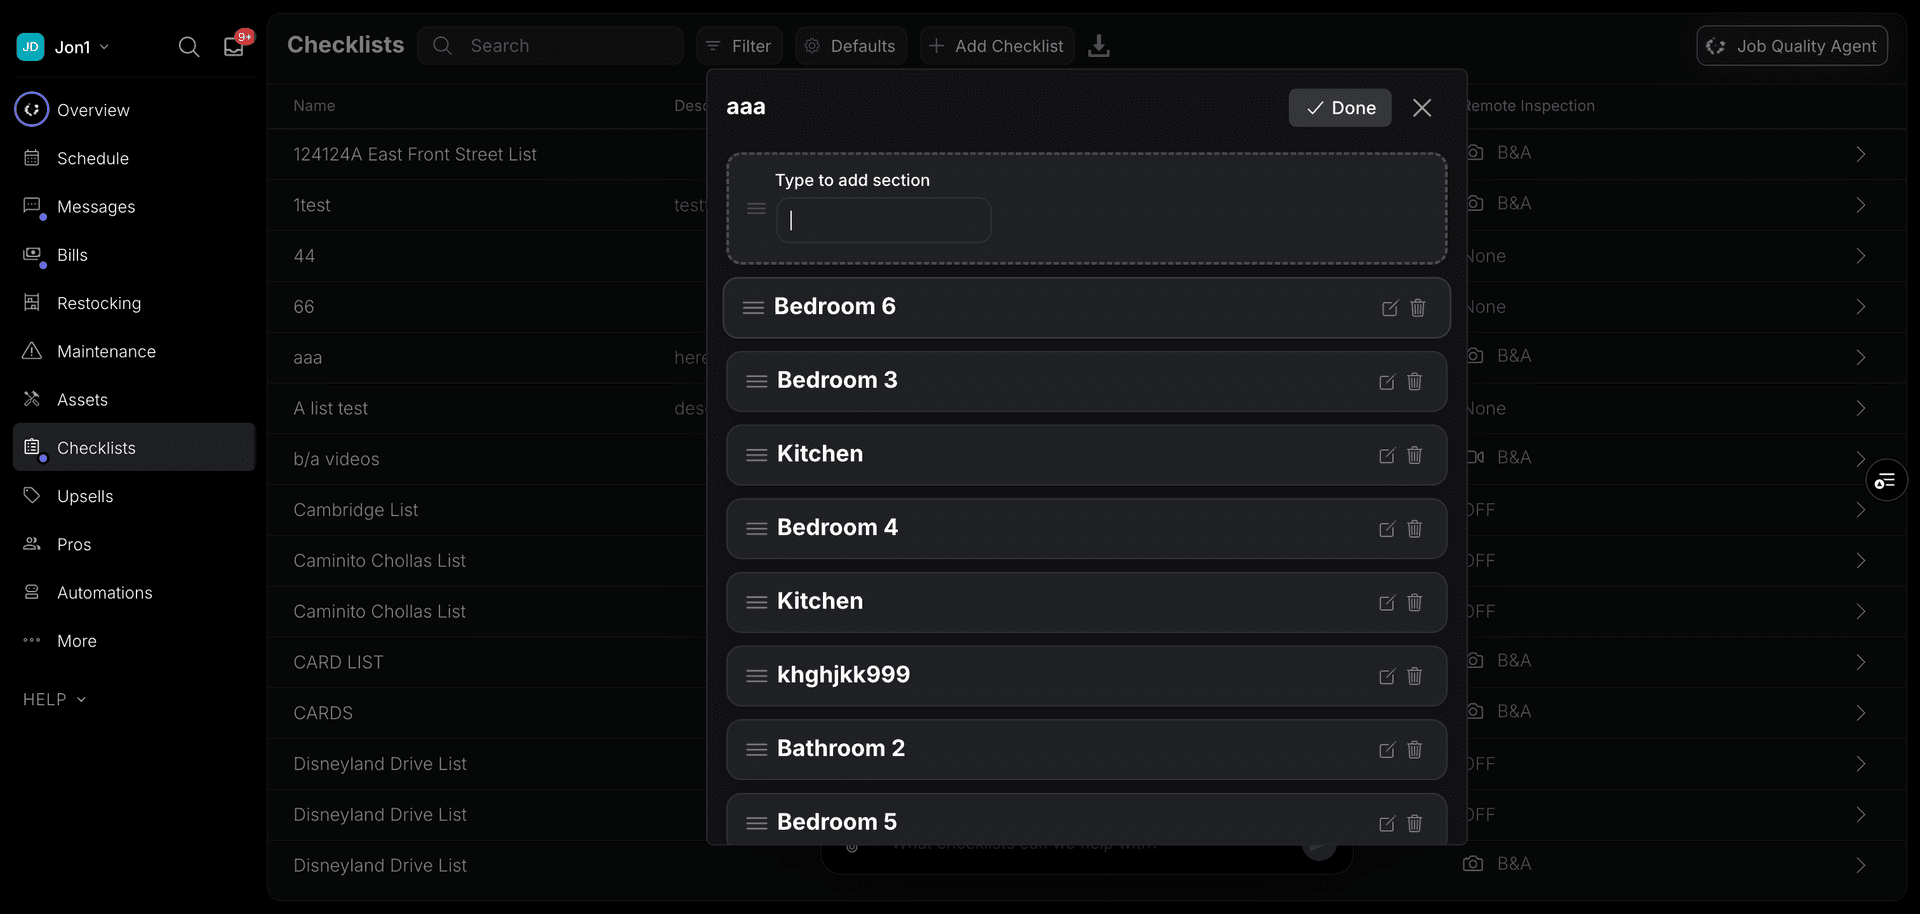
Reordering Sections and Items
To change the order of your sections or items, enable Edit Priorities mode using the toggle at the top of the checklist. Once enabled, you can drag and drop sections and items to rearrange them. The order is saved automatically.
Sharing a Checklist
You can generate a shareable link for any checklist by tapping the share button. This is useful for sharing instructions with team members or reviewing a checklist outside the app.
Checklist Templates
When creating a new checklist, you can choose to start from a template instead of building from scratch. The most popular checklist options selected by users show up as templates, so you can follow those examples to get started quickly. Templates cover common scenarios like standard cleaning, deep cleaning, and property inspections.
Using One Checklist Across Multiple Properties
You no longer need to copy a checklist to use it at another property — the same checklist can be assigned as the default for any number of properties, so there’s usually no need to duplicate one. This is the recommended way to keep the same list of items consistent across properties (see Default Checklists below).
There isn’t currently a way to duplicate an existing checklist to use as a starting point for a new, customized one at another property — if you want a similar but not identical checklist elsewhere, you’ll need to build it from scratch or start from a template for now. This is a frequently requested feature we hope to support soon.
Mark Rooms as "Do Not"
In the room settings, you can also indicate that you "Do Not" want someone to clean or do anything in a room. For example, if you have an office that you never want someone to go into, it’s best to add the room but label it as "Do Not" and add a photo of the door so they know what to avoid.
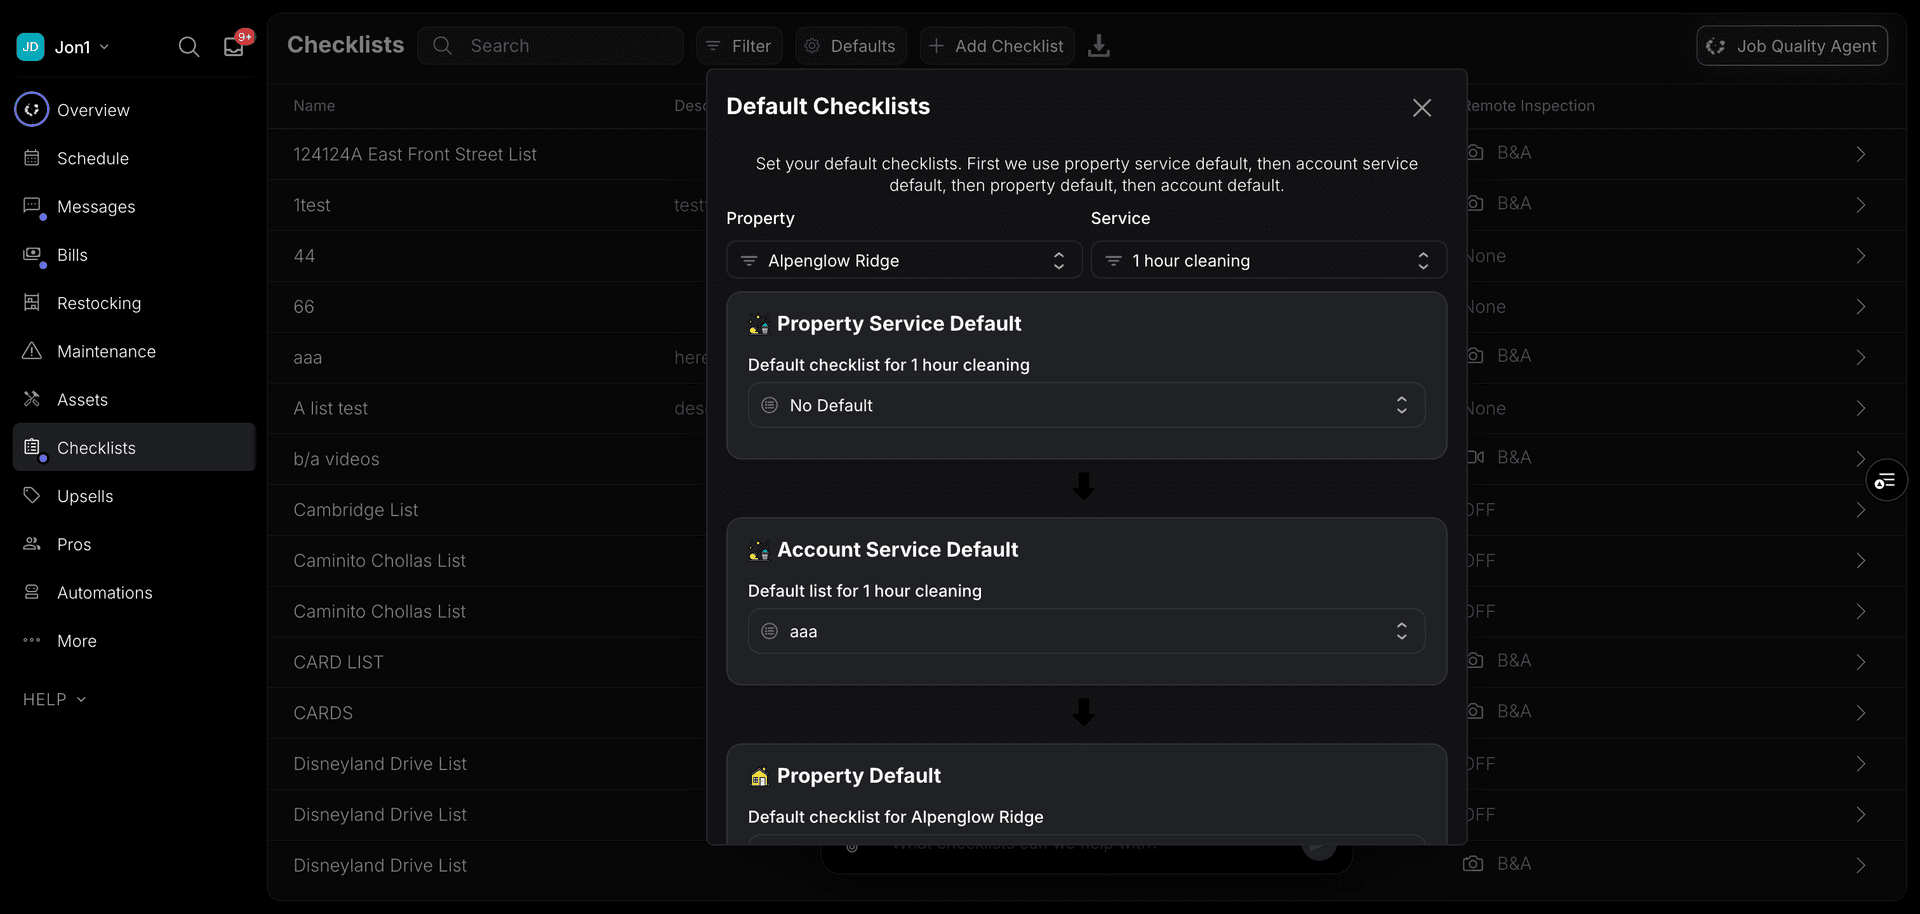
Default Checklists
You can automatically assign default checklists based on different levels within your account. This feature helps you streamline your workflow and ensures that the right checklist items are assigned every time.
How It Works
With this feature, you can automatically apply checklists in the following ways:
- Property + Job Type
- Automatically assign specific checklists based on both the property and the type of job. For example, you can set different cleaning checklist items for a deep clean versus a standard clean at a specific property.
- Account + Job Type
- Apply checklists across your entire account based on the job type. This is perfect if you want consistent checklist items for similar job types, no matter which property they’re for.
- Property
- Assign a checklist to a specific property, regardless of the job type. This is useful if certain properties always require the same checklist items, like routine maintenance checks.
- Account
- Set a checklist that applies to all jobs under your account. This option is great for general checklist items that need to be done across the board, no matter the property or job type.
- To set your default checklists, go to the Checklists section and hit "Defaults"
- Select the property/service type you’d like to set rules to and make any necessary adjustments